☎ (719) 600-2752
★★★★★ Taping & Finishing Drywall in the Springs Since 2009

Colorado Springs Drywall Finishing Contractors.

Taping, mudding, corners, sanding, and texture or smooth Level 5 finishes. We finish drywall so the seams disappear under Colorado's bright sun.

  • Free Same-Day Estimates
  • Licensed & Insured
  • Level 4 & Level 5 Finishes
$
Free Written QuotesFinish level and texture spelled out room by room
☀
Raking-Light CheckedEvery wall or ceiling inspected the way winter sun will hit it
◎
Zero Mess GuaranteeContainment, sealed vents, dust-collecting sanders
✓
Written WarrantyCovers tape, mud, corners, and finish
Why Call Us

Why Colorado Springs Homeowners and Builders Hire Our Drywall Finishers

1

Experienced Drywall Finishers, Not Just Hangers

Some crews are fast at hanging board, then rush the tape and mud to get to the next job. Finishing is most of what we do. We tape, mud, and smooth walls and ceilings every week, including after every popcorn ceiling removal we handle. Ceilings are the hardest surface to get smooth, so walls come easy to us.

What that means for you: the same experienced crew from start to finish, and walls that look professionally done once the paint goes on.

2

Drywall Taping and Mudding Done Right for Colorado's Dry Air

At 6,000 feet, drywall mud dries fast and cracks if it goes on too thick. So we tape seams with a stronger, quick-setting mud that doesn't shrink. Then we build the finish in thin coats. In winter, we keep the space warm so everything dries properly.

What that means for you: seams that stay closed through dry Colorado winters, and if one ever cracks, our workmanship guarantee means we come back and fix it.

3

Level 4 and Level 5 Finishes Checked Before We Leave

A wall that looks perfect at noon can show every seam at 4 PM, when low sun shines across it. Before we call any wall done, we hold a bright light flat against it to find small bumps and dips. Anything we find, we fix. We'll show you this at the final walkthrough, and our written warranty backs it up.

What that means for you: smooth walls in any light, and a crew that comes back if something isn't right.

The Basics

What Does Drywall Finishing Include? Taping, Mudding, Sanding & Texture

Drywall finishing is everything between hanging the board and painting it. You might hear it called taping, mudding, or "tape and mud." It's all the same job, and it determines whether your walls look custom or low quality. Here's what we do, step by step, to get you great results.

Step 1

Prep & Corner Bead

We set metal corner bead on outside corners, fix loose screws, and fill any wide gaps first. A solid base means much fewer cracks years down the line.

Step 2

Taping Drywall Seams & Corners

We press paper tape into mud on every seam and inside corner. In our dry Colorado air, we work in short sections so the tape never dries loose.

Step 3

Mudding: Fill & Finish Coats

Two more thin coats, each spread wider than the last. Thin coats are key here, because thick mud shrinks and cracks at our altitude.

Step 4

Sanding Drywall Smooth

We sand with dust-collecting sanders, then shine a bright light across each wall. Any bump gets fixed before the job is complete.

Step 5

Texture or Smooth Level 5 Finish

Knockdown or orange peel to match the rest of your Colorado Springs home, or a full skim coat for smooth walls. Your drywall will be ready for primer.

Primer and paint: we can handle this for you if you prefer, we will quote it separately. If you need hanging and finishing, see our drywall installation page for hang, tape, and finish pricing.

What We Finish

Drywall Finishing Services in Colorado Springs

From one closet to a whole new home, here's the drywall finishing we do every week across El Paso County. Every job comes with a written price, finish level spelled out, and our workmanship guarantee.

◫

Finish-Only Drywall Service for DIY Projects

Drywall finishers taping a basement a homeowner hung in Colorado Springs

You saved money hanging your own drywall. Now you want walls that look professionally done. Hanging is straightforward, but finishing takes years to get right.

Here's what we do:

  • Check your hang job. If anything will cause cracks later, we show you. You can either fix it yourself or have us handle it.
  • Tape and mud. Three thin coats on every seam, corner, and screw, done right for our dry air.
  • Sand and inspect. Dust-collecting sanders, then a bright light across every wall to catch bumps.
  • Texture or smooth. Matched to your house, cleaned up, and ready for primer.

Firm written price, typically $1.00–$2.00 per sq ft. Most rooms take 3–4 days and basements about 6–8. Backed by our workmanship guarantee.

⌗

Basement Drywall Finishing

Taped and mudded drywall in a finished Colorado Springs basement

Finishing the basement is one of the most popular projects in Colorado Springs, especially in east-side neighborhoods like Meridian Ranch, Banning Lewis Ranch, and Falcon. We've finished basements all over town since 2009, so we know what to look for.

Here's what we take care of:

  • Floating walls. Many basements here are built to handle shifting clay soil. We finish them so they can still move without cracking.
  • The tricky spots. Clean corners around egress windows, straight edges on ducts and beams, and smooth stairwell walls.
  • Your inspections. We schedule around your PPRBD sign-offs so walls never get closed up too early.
  • A finish that matches. Texture matched to your main floor so the basement feels like part of the house.

Firm written price, typically $2,500–$5,500+ total for a basement with about 1,000 sq ft of floor space (roughly 3,000 sq ft of walls and ceilings), depending on how many rooms and corners it has. Usually 6–8 working days. Backed by our workmanship guarantee.

✦

Level 5 Drywall Finish for Smooth Walls & Ceilings

Smooth Level 5 drywall finish in a bright Colorado Springs great room

Smooth walls are the look most Colorado Springs remodels and custom homes want right now. To get them right, you need a Level 5 finish: a thin coat of mud over the entire wall, not just the seams. Without it, seams show through your paint the first time bright sun hits the wall.

Here's how we do it:

  • Full skim coat. A thin layer over every inch, sanded flat so paint goes on evenly.
  • Checked in bright light. We shine a light across each wall the way low winter sun will, and fix anything it shows.
  • Honest advice. If a room doesn't need Level 5, we'll tell you. We quote it room by room, so you only pay where it shows.

We do this every week on smooth ceilings after popcorn removal, the hardest surface to get perfect. Typically $1.50–$3.00 per sq ft, backed by our workmanship guarantee.

↺

Drywall Finishing Repair: Fixing a Bad Tape and Mud Job

We often get called after someone else's finishing goes wrong: seams showing through paint, raised lines on the wall, bubbled tape, or corners already cracking. Whether it was a DIY attempt or a crew that stopped answering the phone, we can make it right.

Here's how we fix it:

  • Find the cause first. Loose tape, thick mud, and missed coats each need a different fix. We show you what went wrong before we quote.
  • Repair it properly. Loose tape gets cut out and redone, not buried under more mud. Raised seams get flattened and blended out wide.
  • Blend it in. If spot fixes won't match, we skim the whole wall so you can't tell where the problem was.

Call us for a quick opinion. Most repairs run $1.25–$2.50 per sq ft, and the fix is backed by our workmanship guarantee.

◖

Drywall Corner Finishing & Corner Bead Installation

Corners are the first place you can tell good finishing from bad. Wavy inside corners and cracked outside edges make a whole room look rushed. We take the extra time to get them right.

Here's what we do:

  • Straight inside corners. Finished with a corner tool for a crisp line from floor to ceiling.
  • Outside corners that last. We use paper-faced metal bead that bonds into the mud, so it won't crack the first time a vacuum bumps it.
  • Bullnose that matches. Rounded corners are common in Briargate and Stetson Hills homes. We match the curve so new rooms blend in.
  • Upstairs ceiling corners. Finished to flex with winter truss lift, so they don't crack open every January.

Cracked or dented corners on existing walls usually run $150–$350 per section. Backed by our workmanship guarantee. See our corner finishing guide for more.

▣

Garage Drywall Taping & Finishing

Most garages don't need a living-room finish, and we won't charge you for one. We'll help you pick the right level for how you actually use the space.

Here's how it works:

  • Basic garage finish. Seams taped with one coat (Level 2). It covers the fire-rated walls and ceiling shared with your house, so you pass inspection and don't get flagged when you sell.
  • A cleaner look. Planning a gym, workshop, or future conversion? A Level 3 finish with knockdown texture looks great for not much more.
  • Winter heat. Unheated Colorado Springs garages get too cold overnight for mud to dry properly. We bring heaters when needed.

Firm written price. A basic Level 2 garage finish typically runs $500–$1,000 for a two-car garage, or about $900–$1,800 with Level 3 and knockdown texture. Backed by our workmanship guarantee.

▦

New Construction Drywall Finishing for Builders & Remodelers

We tape and finish new homes, additions, and multi-unit projects for builders and remodelers from Northgate to Falcon and Peyton. You need a finishing crew that shows up on time and doesn't leave callbacks. That's what we focus on.

Here's what you can count on:

  • A written schedule. Your painters and trim crew can book their dates with confidence.
  • The right tools for each space. Automatic tapers on big open walls for speed, hand finishing on stairwells and tight spots for control.
  • Consistent results. The same finish and texture in every home in a phase, so walkthroughs go smoothly.
  • Fast follow-up. Punch lists closed out quickly, and warranty touch-ups handled after closing.

Finish-only or hang and finish, bid from your plans. We carry liability insurance and workers' comp, with proof sent along with every bid.

🏢

Commercial Drywall Finishing Contractor

We finish drywall in office suites, retail stores, medical offices, and apartment buildings around Colorado Springs, from downtown to the Powers and Interquest corridors. Your opening date matters, so we plan our work around it.

Here's what we handle:

  • The right finish in each space. Level 5 on storefronts under bright lights, Level 4 in offices, and nothing wasted where it won't show.
  • Fire-rated walls. Taped above the ceiling grid to pass inspection the first time.
  • Occupied buildings. After-hours work and dust containment, so neighboring businesses and tenants stay open.

Bid from your plans, with proof of liability insurance and workers' comp included. For full build-outs, see our commercial drywall installation services.

Finishing existing walls, not new board? We handle skim coating old knockdown smooth, repairing holes, and matching texture on patches, see our drywall repair page. Ceiling-specific problems are covered in our ceiling repair guide.

The Most Important Line on Your Quote

Drywall Finish Levels 0–5: Which One Does Your Home Need?

Drywall finish levels describe how smooth your walls will be. When two quotes are thousands of dollars apart, it's usually because they're quoting different levels. Here's what each level means, in plain English, for a Colorado Springs home.

Drywall Finish Levels Explained
LevelWhat's DoneBest For
Level 0Drywall hung, nothing elseTemporary walls, or board that will be covered later
Level 1Tape only, no smoothingAttics and fire-rated walls hidden above commercial ceilings
Level 2Tape plus one coat of mudGarages, walls getting tile, and utility rooms
Level 3Tape plus two coatsRooms getting heavy texture, shops, and nicer garages
Level 4Most common hereTape plus three coats, sanded smoothMost Colorado Springs homes with knockdown or orange peel texture
Level 5Smooth wallsLevel 4 plus a thin coat over the entire wallSmooth walls, paint with a sheen, and rooms with big windows facing the mountains

Level 4 vs. Level 5 Drywall Finish: Which Do You Need?

If your walls are getting knockdown or orange peel texture, like most homes in Colorado Springs, Level 4 is all you need. The texture hides the seams, and paying for Level 5 underneath it is money you'll never see.

But Level 5 is worth the extra money if any of these apply to you:

  • You want smooth walls or ceilings. This is the big one. Smooth walls over a Level 4 finish almost always show the seams.
  • You're using eggshell, satin, or a dark paint color. Shine and dark colors make every seam easier to see.
  • Sunlight hits the wall from the side. Big west-facing windows toward Pikes Peak, skylights, or recessed lights near a wall all cast shadows on small bumps. Our low winter sun is especially hard on walls.
  • It's a showcase room, like a two-story great room, an entryway, or a storefront.

Many of our customers mix the two: Level 5 in the rooms that get strong light, and Level 4 with texture everywhere else. We list the level for every room in your quote, so you only pay for Level 5 where it makes a difference.

What Is a Level 5 Drywall Finish?

A Level 5 finish starts as a normal three-coat Level 4 finish. Then we spread a thin coat of mud over the entire wall or ceiling, not just the seams, and sand it smooth. This makes the whole surface the same material, so paint goes on evenly and seams can't show through.

Some crews spray on a thick primer instead. That can work on brand-new walls in good shape, but on walls that get a lot of Colorado sun, we still recommend a real skim coat. It also fills in small dips that primer alone can't hide.

Is a Level 5 Drywall Finish Worth the Cost?

On a 12'×12' bedroom with knockdown texture, no. On a 20'×20' great room with smooth walls and west-facing windows, absolutely. Level 5 usually adds $0.50–$1.00 per square foot, about $500–$1,000 on a large room. That's far less than repainting later because the seams show, or having someone come back to skim the walls after your furniture is in.

A good question to ask every contractor: "Is your price for Level 4 or Level 5, and in which rooms?" A good drywall finisher will answer right away with a recommendation.

2026 Colorado Springs Pricing

How Much Does Drywall Finishing Cost in Colorado Springs?

The average cost to finish drywall in Colorado Springs is around $1-$2 per square foot for a standard Level 4 finish with texture, including labor and materials. Smooth Level 5 walls run about $1.50 to $3.00 per square foot. Here's how pricing works, so you know what a fair quote looks like.

Level 4 + Texture
$1.00–$2.00

Per sq ft, finish only

Level 5 Smooth
$1.50–$3.00

Per sq ft, full skim coat

12'×12' Room
$550–$1,100

About 530 sq ft, walls and ceiling

Basement
$2,500–$5,500+

~1,000 sq ft floor, finish only

Drywall Finishing Cost Per Square Foot

Drywall Finishing Cost by Finish Level
Finish LevelTypical CostWhat You Get
Level 1Tape only$0.35–$0.60 / sq ftTape on every seam. Used for attics and fire-rated walls hidden above commercial ceilings.
Level 2Garage finish$0.50–$0.90 / sq ftTape plus one coat. Right for garages, utility rooms, and walls getting tile.
Level 3Under heavy texture$0.85–$1.50 / sq ftTwo coats, ready for heavy texture. Good for shops and nicer garages.
Level 4 with textureMost common in Colorado Springs$1.00–$2.00 / sq ftThree coats, sanded smooth, with knockdown or orange peel to match the rest of your house.
Level 5 smooth$1.50–$3.00 / sq ftLevel 4 plus a thin coat over the whole wall. Ideal for smooth walls, paint with a sheen, and rooms with strong sunlight.
Fixing a bad finish jobAnother crew's or a DIY attempt$1.25–$2.50 / sq ftLoose tape redone, raised seams flattened, then blended in. We look first and price what we actually find.

Cost to Tape and Mud Drywall by Project

Typical Colorado Springs Drywall Finishing Projects
ProjectApprox. Drywall AreaFinish-Only Cost (Level 4)
Small finishing jobA closet, one wall, or a small sectionUnder ~150 sq ftPriced by the job, usually $250–$600
BedroomAbout 12'×12'~530 sq ft$550–$1,100
Large room or bonus roomAbout 20'×20'~1,000 sq ft$950–$1,800 (Level 5: $1,500–$2,800)
Two-car garageLevel 2–3~1,000–1,200 sq ft$500–$1,800
BasementAbout 1,000 sq ft of floor, common in east-side homes~3,000–3,500 sq ft$2,500–$5,500+
Whole house, new constructionAbout 2,000 sq ft of floor~6,000–7,000 sq ft$5,000–$10,500

Prices assume the drywall is already hung. Primer and paint are quoted separately. Bigger, simpler jobs land at the low end, while small rooms, tall ceilings, and lots of corners push toward the top. Need drywall hung too? See our drywall installation cost guide.

Drywall Finishing Cost Calculator

Enter your square footage and finish level for a quick Colorado Springs estimate.

Estimated finishing cost
$950–$1,800
Drywall area—
Rate used—
Coats of compound—
Typical finishing time—

Floor-area estimates use 3.25× your floor square footage for walls and ceilings. This is a planning range. Your written quote is based on your actual space, and it won't change once we start.

Get an Exact Quote

What Affects the Cost to Finish Drywall?

  • Finish level. This is the biggest factor. Each level adds another coat, more sanding, or a full skim coat.
  • Corners and details. A big open wall finishes fast. A basement with window wells, boxed-in ducts, and lots of corners takes longer per square foot.
  • Seams in the middle of the wall. Where two short ends of drywall meet mid-wall, the seam has to be blended out extra wide to hide it. More seams takes more time to finish well.
  • Ceiling height. Standard walls are quick. Vaulted great rooms and two-story entries, common in Briargate and Flying Horse, need scaffolding.
  • How well it was hung. Gaps, loose screws, and uneven sheets have to be fixed before taping. A clean hang job saves you money.
  • Season. In a Colorado Springs winter, unheated garages and new builds need heaters so the mud dries properly.
  • Project size. Setup and cleanup take about the same time for a closet or a whole floor, so bigger jobs cost less per square foot.

Do Drywall Finishers Charge by the Hour?

Some finishers and handymen in Colorado Springs charge by the hour, usually $45 to $85 per person, plus materials. The catch is drying time. Every coat has to dry before the next one, so even a small job takes three or four trips, and the hours add up. You often don't know the real total until the job is done.

We price by the job instead. Before we start, you get a written price that covers everything: materials, floor protection, every coat, sanding, texture, and cleanup. That's what you pay, even if the mud needs an extra day to dry or the job takes an extra trip. If something takes longer, that's on us, not you.

It also means you can compare our quote line by line against anyone else's, and know exactly what you're getting before you decide.

Red Flags in a Drywall Finishing Quote

A fair quote tells you exactly what you're getting. Whoever you hire, watch for these:

  • No finish level listed. "Tape and mud" could mean Level 2 or Level 5. Ask which level, and in which rooms.
  • Only two coats for smooth walls. That's a Level 3 finish, and the seams will show through your paint.
  • Mesh tape everywhere with ready-mixed mud. Mesh tape needs a stronger, quick-setting mud. With ready-mixed mud, seams tend to crack, especially in our dry Colorado air.
  • A timeline that's too fast. If a basement is quoted at two days start to finish, coats are being rushed or skipped.
  • No mention of texture matching when new drywall meets your existing walls.
  • No written warranty or proof of insurance. A verbal "we stand behind our work" is hard to hold anyone to if a seam cracks next winter.

Every quote we write lists the finish level, texture, and price for each room. It comes with proof of liability insurance and our written workmanship warranty. We've been finishing drywall around Colorado Springs since 2009, and we're happy to walk you through any line on it, or anyone else's quote you're comparing.

How We Tape and Mud

How We Tape and Mud Drywall: Our Finishing Process, Step by Step

Whether it's one bedroom or a whole new house, every job follows the same steps. No shortcuts, no skipped coats, and you'll know what's happening every day we're there.

1

Free Walkthrough & Written Quote

We look at every seam, corner, and screw before pricing. If you or someone else hung the drywall, we'll point out anything that could cause cracks later. You get a written quote with the finish level for each room.

2

Protect Your Home & Prep the Walls

We cover floors, hang plastic, and seal air vents so dust stays put. Then we fix loose screws, set corner bead, and fill wide gaps so the tape has a solid base.

3

Taping Every Seam & Corner

Paper tape goes into a strong, quick-setting mud that won't shrink in Colorado's dry air. This first coat is what keeps your seams from cracking later.

4

Mudding: Two More Thin Coats

Each coat is spread wider and thinner than the last. Seams where two short ends meet get blended out extra wide, up to 20 inches, so you never see a bump in the wall.

5

Sanding & Bright-Light Inspection

We use dust-collecting sanders to keep your home clean. Then we hold a bright light flat against every wall, the way low winter sun will hit it, and fix anything that casts a shadow.

6

Texture, Cleanup & Final Walkthrough

Texture is tested on a sample board to match your house, or we apply a smooth Level 5 finish. We haul away the mess and walk through the finished space with you before we call it done.

How Many Coats of Mud Does Drywall Need?

A standard Level 4 finish needs three coats on every seam, corner, and screw: a tape coat, a fill coat, and a finish coat. A smooth Level 5 finish adds one more thin coat over the entire wall. If someone tells you one coat is enough, they're describing a basic garage finish, not walls you'll paint and live with.

Paper Tape vs. Mesh Tape: Which Is Better?

For most seams, paper tape. It's stronger, it folds cleanly into inside corners, and it handles the small seasonal movement Colorado Springs homes go through. Mesh tape works for small patches, but only with a quick-setting mud. Mesh tape with regular bucket mud is one of the most common reasons we see seams crack a year or two after a job is done.

Hot Mud vs. Premixed Joint Compound: What We Use and Why

We use both, each where it works best. Hot mud (setting compound) is a powder mixed with water that hardens in a set time, like 45 or 90 minutes. It's strong and barely shrinks, even in our dry air, so we use it for taping and filling gaps. Premixed mud from the bucket sands smoother, so we use it for the final coats. You get strength underneath and a smooth surface on top.

Where Finish Quality Shows First

Drywall Corner Finishing: Inside Corners, Corner Bead & Bullnose

Corners are the first place you can tell whether drywall was finished well. Wavy inside corners, cracked edges, or a rounded corner that turns square halfway down the wall are all signs of rushed work. Here's how we get corners right, and what to look for in your own home.

How We Finish Inside Corners (and What a Corner Finisher Is)

An inside corner is anywhere two surfaces meet and fold inward, like where two walls come together or where a wall meets the ceiling. They look simple, but they're one of the easiest places to spot rushed finishing. Common problems include wavy lines, thick ridges of mud, bubbled tape, and cracks that show up after the first winter.

Here's what we do differently:

  • Paper tape, not mesh. We fold paper tape down the center and press it into a strong, quick-setting mud. It's stronger and holds up to the small seasonal movement Colorado Springs homes go through.
  • One side at a time. Rushed crews mud both sides at once, which leaves gouges and a wavy line. We finish one side, let it set, then do the other, so the corner stays straight and crisp.
  • Thin coats only. Thick mud in a corner shrinks and cracks in our dry air. We keep every coat thin.
  • The right tool for the job. On smaller jobs we use a handheld corner trowel. On big walls we use a corner finisher (also called an angle head or corner flusher): a tool on a long handle that smooths both sides of the corner in one even pass, floor to ceiling.

Before we move on, we check every corner with a bright light. You end up with one clean, straight line, the kind of detail that makes a room look professionally finished.

Ceiling Corners in Two-Story Homes: Preventing Truss Uplift Cracks

Have you noticed a crack where your upstairs ceiling meets an inside wall that opens every winter and closes again by summer? That's called truss uplift, and it's very common in Colorado Springs two-story homes, especially in Briargate, Stetson Hills, and Rockrimmon.

In cold weather, the roof framing in your attic bows upward slightly and lifts the ceiling with it. It's not a structural problem. But if the ceiling and wall are locked together at the corner, that movement tears the corner open every year. That's why filling it with caulk or mud never lasts.

Here's what we do differently:

  • On new drywall, we keep ceiling screws back from inside walls, or use drywall clips, so the ceiling can move without pulling on the corner.
  • When finishing the corner, we use a flexible tape or finish that bends with the movement instead of cracking.
  • On existing cracks, we can add trim attached only to the ceiling, so it slides along the wall and hides the gap all year.

If a crack looks like something more than truss uplift, like a wide or growing crack or doors that stick, we'll tell you before doing any work. See our truss uplift repair guide for more.

Types of Drywall Corner Bead: Which Is Best?

Corner bead is the strip that protects outside corners. The type you use makes a big difference in how long your corners last:

  • Paper-faced metal bead: what we use on most outside corners. The paper bonds into the mud, so it holds up much better against bumps and seasonal movement.
  • Vinyl bead: resists dents, so it's a good choice for kids' rooms, garages, and busy hallways.
  • Bare metal bead: fast and cheap, and common on production builds. It works, but it's the type we replace most often when the edges crack.
  • Flexible bead: bends for arches, curved walls, and angled ceilings, common in custom homes in Broadmoor and Flying Horse.

Bullnose Corners: Matching Your Colorado Springs Home

Rounded bullnose corners are everywhere in homes built from the late '80s through the 2000s, from Briargate to Stetson Hills. If you're finishing a basement or bonus room in one of these homes, you'll probably want bullnose to match the rest of the house. We match the curve of your existing corners and finish them cleanly down to the baseboard, so the new space looks like it was always there.

Bullnose takes a little more labor than square corners. We'll list it separately in your quote, so you can choose what fits your budget.

The Smart Way to Save on a Basement

Finish-Only Drywall: You Hang It, We Tape and Finish It

Plenty of Colorado Springs homeowners finish their own basement. They pull the permit through PPRBD, frame it, pass inspection, and hang the drywall themselves. Then they hire out the taping and finishing, because that's the part everyone sees. It's a smart way to save.

Before we start, we walk through your hang job with you. Here's what we look for, so you can check it yourself first:

  • Screw depth. Screws should sit just below the surface without tearing the paper. Screws that stick out leave bumps, and screws that tear through don't hold.
  • Screw spacing. About every 12 inches on ceilings and 16 inches on walls. Too few screws leads to bumps (called screw pops) later.
  • Gaps between sheets. Gaps wider than about 1/4" need to be filled before taping. We can handle this, it just adds a little time.
  • Sheets that sit even. If one sheet sticks out past the one next to it, the seam will show no matter how well it's finished.
  • Seams in the middle of a wall. Where two short ends of drywall meet, the seams should be staggered, not lined up down the wall. These are the hardest seams to hide.
  • Floating basement walls. Many basements here are built so the walls can move with our shifting clay soil. The drywall should stop just above the floor, with no screws in the bottom board. This is the most common mistake we find, but it's easy to fix before we tape.
  • Upstairs ceiling corners. In two-story homes, ceiling screws should stay back from inside walls so winter truss uplift doesn't crack the corner.
  • Outlet and switch cutouts. Tight cutouts finish cleanly. Big gaps around boxes need patching first.

If we find something, we'll show you and you choose: fix it yourself before we start, or have us take care of it. Finish-only typically runs $1.00–$2.00 per square foot for a standard Level 4 finish with texture. For hang-only pricing or the full package, see hang-only and finish-only drywall.

Wait for your inspections first. On a permitted basement, PPRBD has to approve the framing, electrical, plumbing, and insulation before drywall goes up. If you hung drywall before your insulation inspection, call PPRBD before you call us. The inspector may need some of it opened back up, and it's much easier to handle before it's finished.

When Finishing Goes Wrong

Common Drywall Finishing Problems and How We Fix Them

Here's what each problem looks like, why it happens, and how it gets fixed properly, so you can tell a lasting repair from a quick cover-up.

Most common complaint

Drywall Seams Showing Through Paint

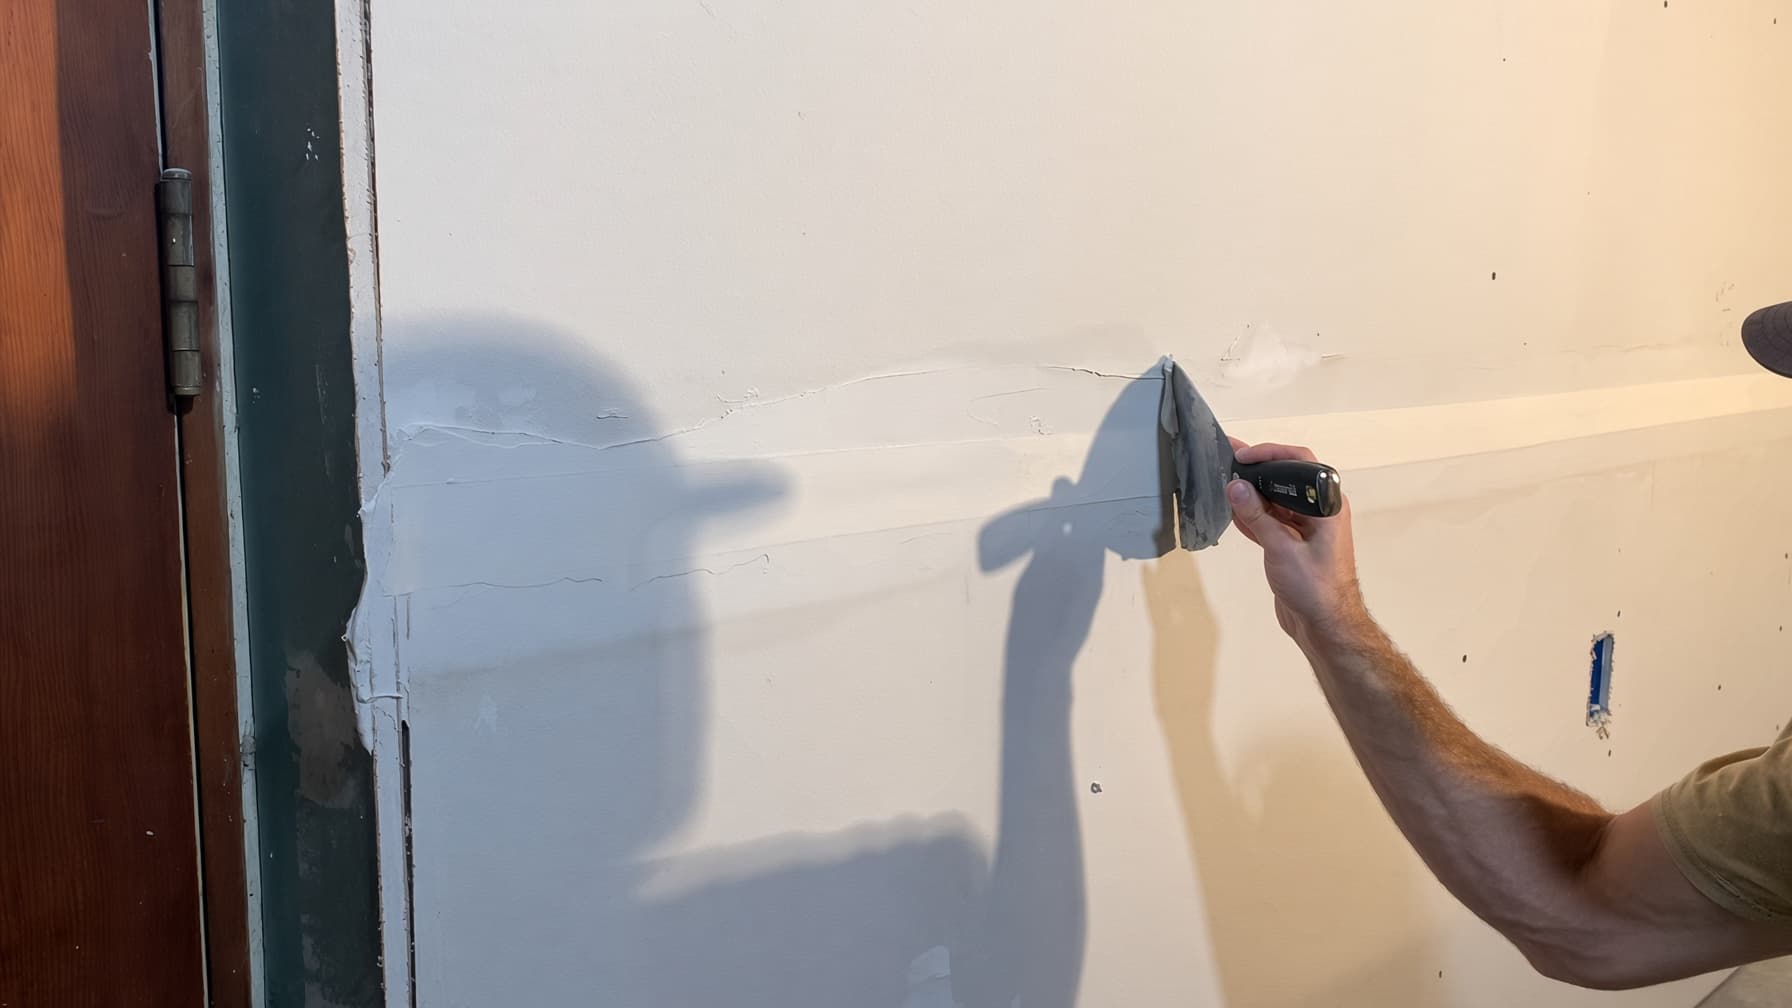
You can see stripes along every seam and dots over every screw, especially when low afternoon sun hits the wall. Painters call this "flashing." It happens because drywall mud is more porous than drywall paper, so it soaks up paint differently and dries duller or shinier. It's worst on smooth walls and with eggshell or satin paint.

How we fix it: more paint won't help, because every new coat soaks in the same uneven way. First, we check whether the seams are just a different sheen or actually raised, by holding a light flat against the wall.

  • If it's only a sheen difference, a coat of drywall primer seals the mud and paper so they absorb paint the same way. Then the wall gets repainted.
  • If the seams are raised, or the wall is smooth, we skim a thin coat of mud over the entire wall (a Level 5 finish). That makes the whole surface one material, so there's nothing left to show through. Then we prime and paint.
Visible from across the room

Raised or Ridged Drywall Seams

This looks like a raised line running down a wall or across a ceiling. It usually shows up where the short ends of two drywall sheets meet. The long edges of a sheet are made slightly thinner, so tape and mud can sit flush. The short ends aren't, so the tape sits on top of the wall and creates a small bump. When a finisher piles mud on that bump instead of spreading it out, you get a ridge you can see from across the room.

How we fix it: we sand the ridge down as far as we can without cutting into the tape. Then we spread thin coats of mud 16 to 20 inches out on each side. This turns a sharp bump into a slope so gradual your eye can't pick it up. We check the result with a bright light held flat against the wall before we prime.

On ceilings, light hits from more angles, so we sometimes skim a wider area to make it disappear completely. If the tape under the ridge has come loose, we'll show you and re-tape it rather than cover it up.

Gets worse over time

Drywall Tape Bubbling or Peeling

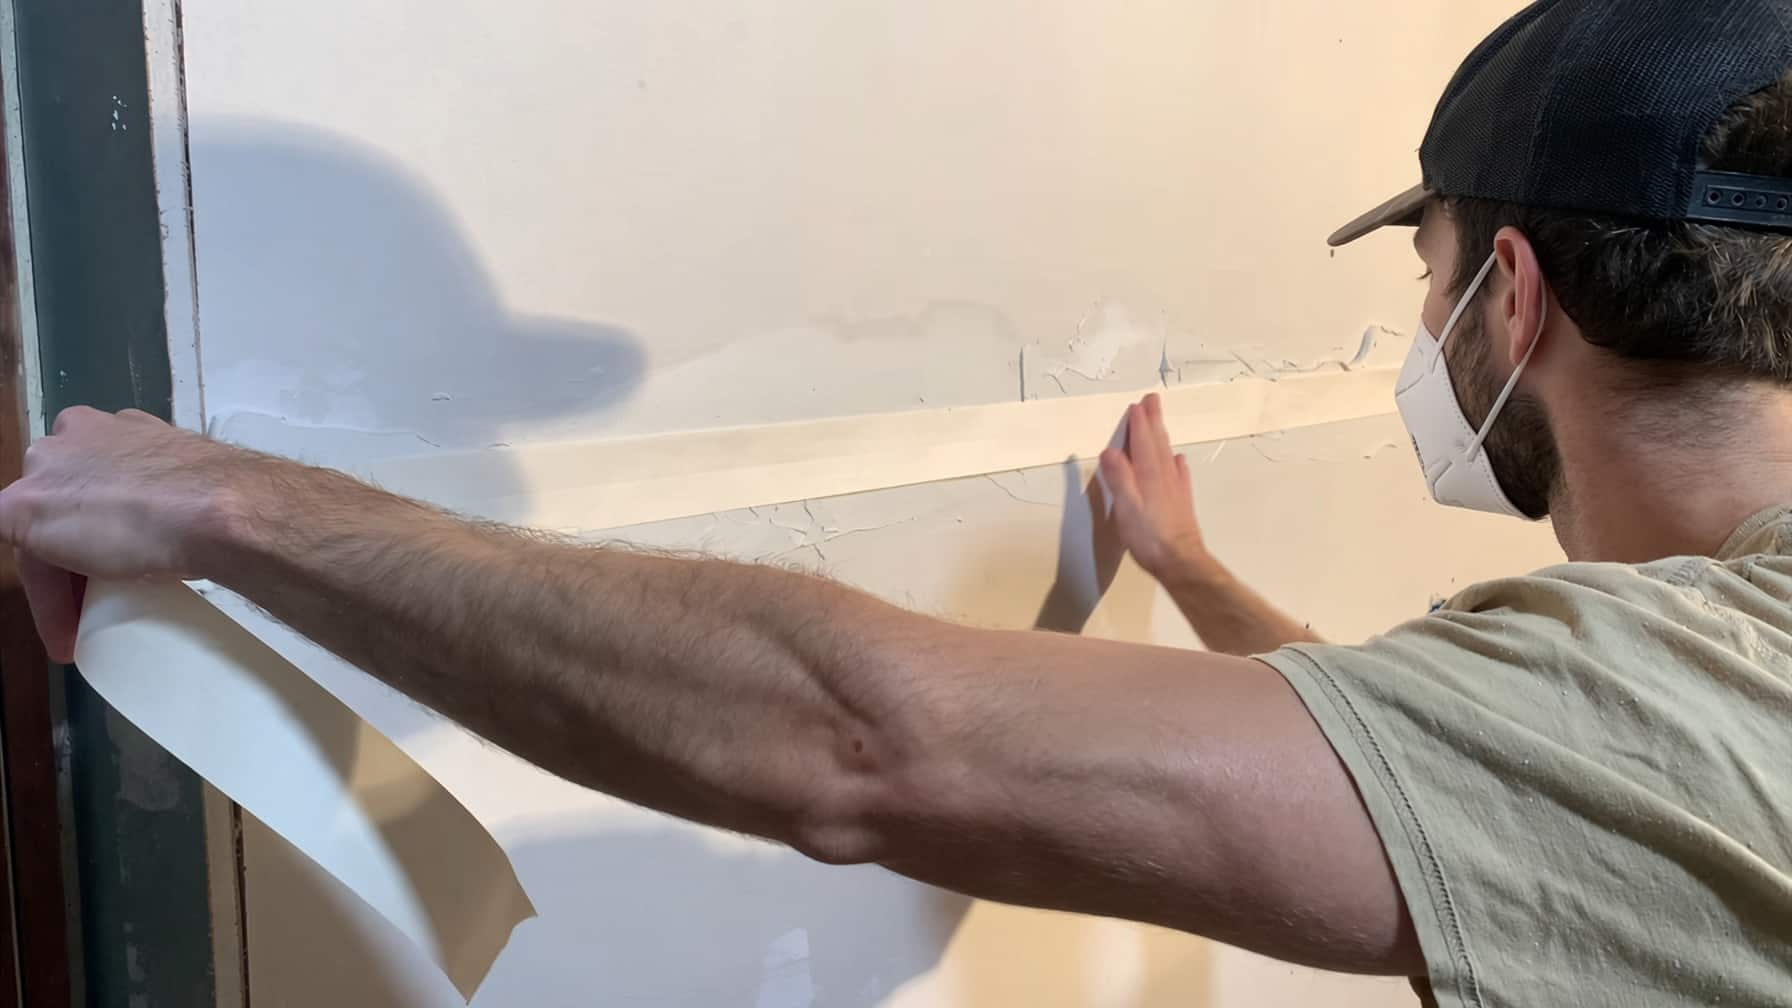
This looks like bubbles, blisters, or loose strips of tape along a seam, sometimes weeks after painting. Drywall tape only holds when it's pressed into a full layer of mud underneath. If there wasn't enough mud, or the mud dried before the tape was pressed in, air pockets form under the tape and it lets go. In our dry Colorado air, mud starts drying in minutes, so this happens a lot when a crew rushes.

How we fix it: putting more mud on top doesn't work, because the problem is underneath the tape. Covering it just hides loose tape that will bubble again. Instead, we cut out the loose section and check the rest of the seam, since one visible bubble often means more loose tape nearby. Then we re-tape it using a quick-setting mud that hardens on its own instead of drying out, so it bonds firmly even in our dry air.

Finally, we apply thin finish coats, sand, and check the seam with a bright light so the repair blends in with the rest of the wall.

Often seasonal

Cracked Inside Corners

This looks like a crack running straight down the corner where two walls meet, or along the line where a wall meets the ceiling. There are two common causes, and the fix depends on which one you have.

If the crack stays the same all year, it's usually too much mud in the corner. Thick mud shrinks as it dries, and splits right down the middle. Sometimes the corner was never taped at all, or was taped with mesh tape that can't hold a corner. We cut out the cracked mud, re-tape the corner with paper tape folded down the center, and finish it with thin coats so there's nothing thick left to shrink.

If the crack opens in winter and closes in summer, it's almost always truss uplift. This is common at upstairs ceilings in Colorado Springs two-story homes. Cold weather makes the roof framing lift the ceiling slightly. Re-taping won't hold, because the ceiling keeps moving. Instead, we finish the corner with a flexible tape that bends with the movement, or add trim attached only to the ceiling so it slides along the wall and hides the gap all year. See our truss uplift guide.

Usually cosmetic

Cracked or Loose Corner Bead

This looks like hairline cracks along the edge of an outside corner, or a corner that bulges out. Corner bead is the strip that protects that edge. Bare metal bead is nailed on, and the mud just sits on top of it. If it wasn't fastened tight, or it gets bumped by a vacuum or furniture, the bead moves and the mud cracks off.

How we fix it: filling the crack won't last, because the bead underneath is still loose. We cut out the damaged section and install paper-faced bead. Its paper face bonds into the mud like tape, so the corner holds together instead of cracking. Then we refinish it to blend in. Rounded bullnose corners get matched to your existing curve.

Common in newer homes

Drywall Screw Pops After Finishing

This looks like small round bumps or cracked circles over screws, usually a season or two after the job. In our dry climate, new framing lumber keeps drying and shrinking for a few years. That leaves a small gap between the drywall and the wood, so the drywall can move and push the screw head out. We see it a lot in newer homes in Banning Lewis Ranch, Wolf Ranch, and Meridian Ranch.

How we fix it: pushing the screw back in and painting over it doesn't last, because the gap is still there. We add a new screw an inch or two away to pull the drywall tight against the framing and close the gap. Then we reset or remove the old screw, and mud, sand, and texture over both so they disappear. If your home is less than a year or two old, check your builder warranty first, since many cover this.

Rushed coats

Hairline Cracks in Drywall Mud

This looks like fine spiderweb cracks in spots that were filled deep, like wide gaps between sheets or patched holes. Regular bucket mud is mostly water. When it's put on thick, it shrinks as the water dries out, and the surface cracks. Colorado's dry air pulls that water out even faster.

How we fix it: mudding over the cracks won't last, because the soft, shrinking mud is still underneath. We scrape out the cracked mud and refill the deep spot with quick-setting mud. It hardens through a chemical reaction instead of drying out, so it barely shrinks. Then we finish with thin coats of regular mud that dry evenly and stay smooth.

Shows after paint

Sanding Marks Showing Through Paint

This looks like swirl marks or scratches, or rough, fuzzy patches on the wall. Swirls come from sandpaper that's too coarse, which leaves grooves in the mud. Fuzzy patches happen when the sander wears through the mud and scuffs the drywall paper underneath. Both are hard to see on bare mud, but paint settles into every groove and raised fiber, so they jump out after the first coat.

How we fix it: for swirl marks, we apply a thin coat of mud to fill the grooves, then sand lightly with fine sandpaper. For fuzzy paper, we seal it first. Raw paper soaks up water from fresh mud and bubbles, so a sealer locks the fibers down. Then we skim it smooth, sand, and prime so the wall takes paint evenly.

Not sure what went wrong with your walls? Call us (719) 600-2752. We're happy to help!

Built for the Front Range

How Colorado Springs' Dry Climate Affects Drywall Finishing

At over 6,000 feet, with dry air, strong sun, and cold nights, drywall mud behaves differently here.

Why Drywall Mud Cracks

Our dry air pulls moisture from the surface of the mud first. A thick coat can feel dry on top while still soft underneath, then shrink and crack days later. This is why we keep every coat thin, and we use quick-setting mud anywhere a deep fill is needed.

Why Drywall Tape Bubbles

On a dry day with the furnace running, mud can start drying before the tape is pressed into it. That leaves air pockets, and the tape bubbles later. To account for this, we tape in short sections, so every piece goes into fresh, wet mud.

Finishing Drywall in Cold Weather

Mud, texture, and primer need the room to stay above 55°F to cure properly. Garages, additions, and new builds can drop well below that overnight, especially in Black Forest, Monument, and Woodland Park. When needed, we bring heaters and plan them into your schedule.

Summer Storms and Drying Time

July and August afternoon thunderstorms bring short bursts of humidity, and a coat might take a few extra hours to dry. We keep windows closed and adjust the day's work instead of sanding mud that isn't ready. Rushing that step is how scratches and soft spots end up under your paint.

Why Seams Show in Low Winter Sun

Colorado Springs gets over 240 sunny days a year! In winter, the sun comes in low and shines across walls, turning tiny ridges into shadows. We check every wall with a bright light held flat against it, and we'll recommend a smooth Level 5 finish only in rooms where that light will actually show the difference.

Clay Soil, Truss Uplift, and Walls That Move

Our clay soil can shift basement floors, and roof framing lifts upstairs ceilings a little every winter. Finishing that doesn't allow for that movement cracks. Because of this, we keep the gap at the bottom of floating basement walls and finish upstairs ceiling corners so they can flex.

How Long Does Drywall Mud Take to Dry in Colorado Springs?

Type of Mud & ConditionsTypical Drying Time HereGood to Know
Quick-setting mudAlso called hot mudHardens in 45–90 minutesHardens through a chemical reaction, so humidity doesn't matter. This lets us apply more than one coat in a day.
Bucket mud, thin coatHeated homeUsually 4–12 hoursOften ready by the next morning, sometimes the same afternoon in a warm basement.
Bucket mud, thick fill12–24+ hoursCan feel dry on top while still soft inside. That's why we use quick-setting mud for deep fills.
Unheated space below 55°FMay not dry properlyCommon in winter garages and new builds. We bring heaters.
Summer storm afternoonsJuly and AugustA few extra hoursShort-lived. We plan around it instead of rushing.

Once the final coat is dry and sanded, new drywall needs a coat of primer before paint. Most homeowners can prime within a day or two of our final walkthrough.

How Long Does It Take to Tape and Finish Drywall?

  • Single room or bonus room: about 3–4 working days from first tape to ready for primer.
  • Two-car garage (Level 2–3): about 2–3 days, plus heater time in winter.
  • Basement (900–1,400 sq ft of floor): about 6–8 working days. We work room by room, so one area dries while we coat the next.
  • Whole house, new construction: about 2 weeks, staged so your painters can start in finished rooms.
  • Smooth Level 5 finish: adds about 1–2 days for the extra skim coat and sanding.

Before we start, you'll get a simple day-by-day plan, so you know when we'll be there and when the walls are just drying. If anything changes, we'll tell you right away.

How the Pros Do It

Hand Finishing vs. Automatic Drywall Taping Tools: Which Is Better?

Good drywall finishers use both, and pick the right tools for your space.

Automatic Taping Tools for Big, Open Walls

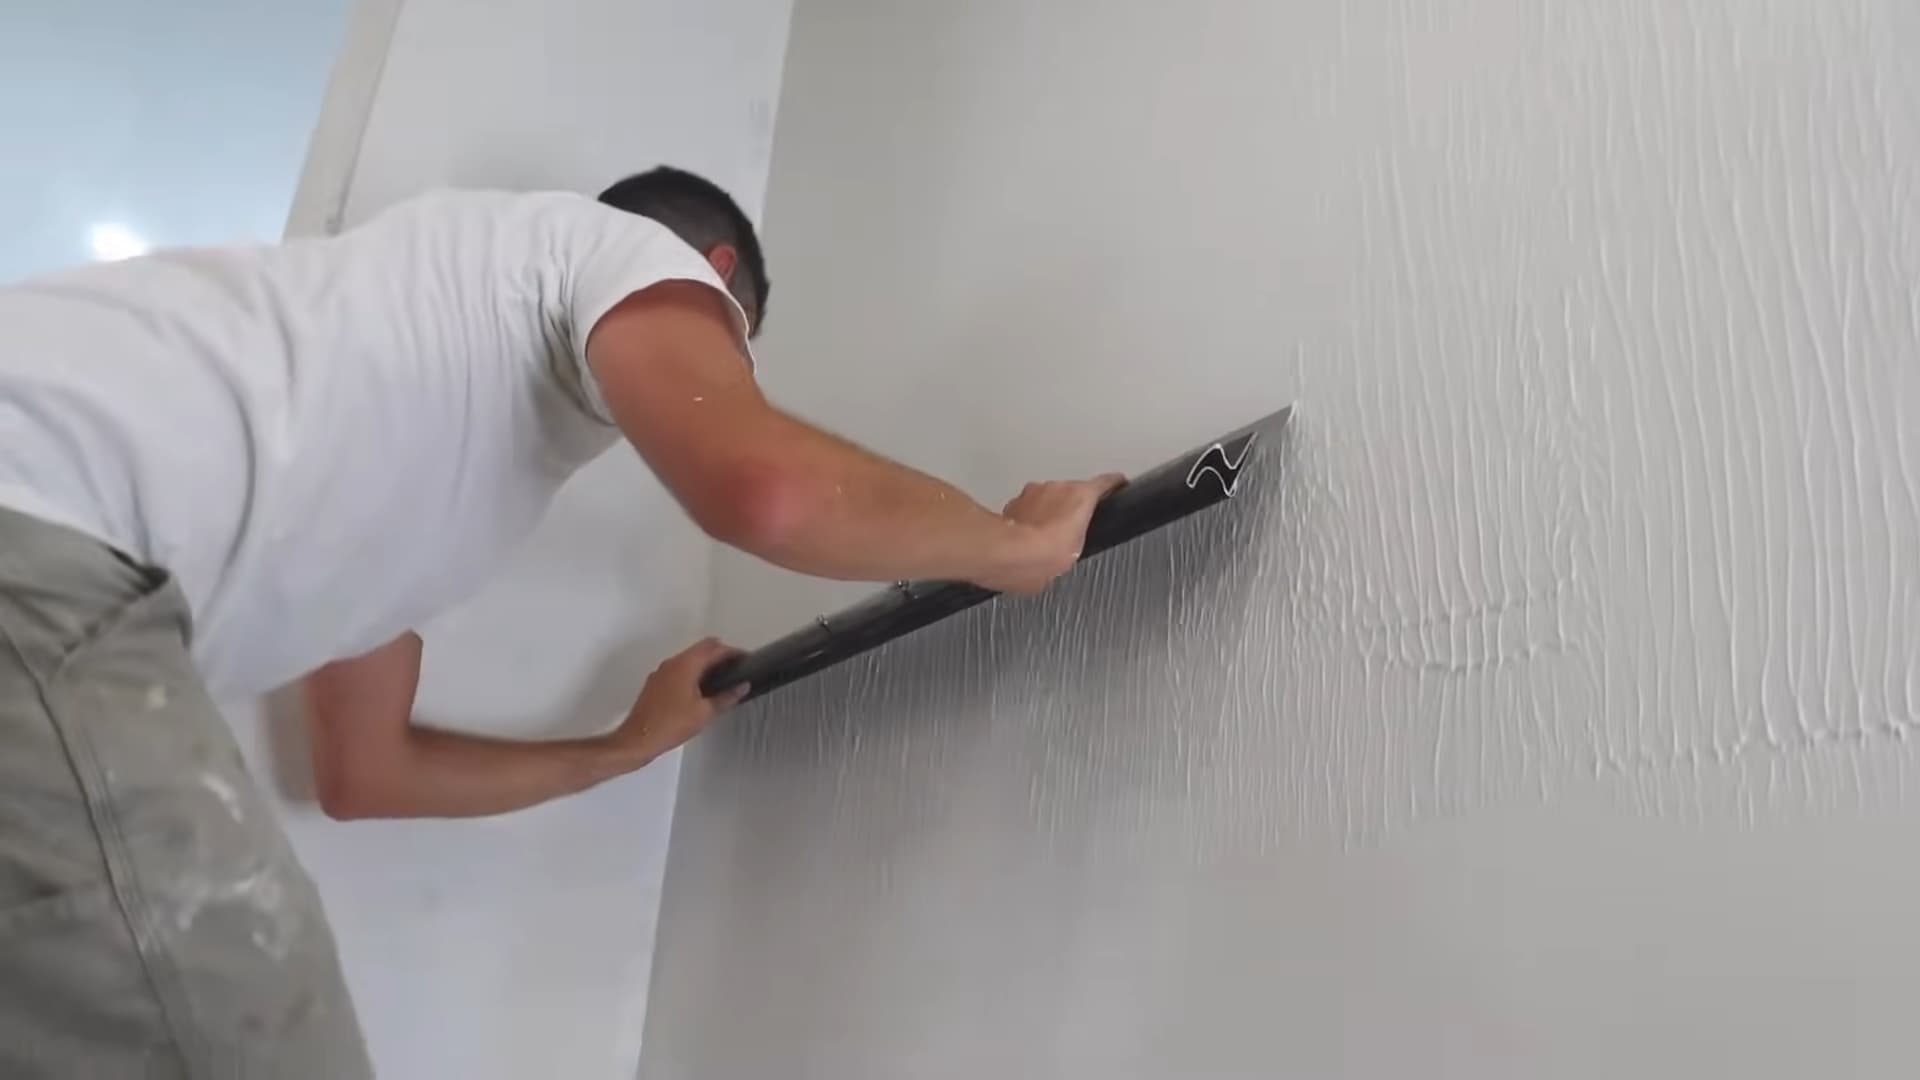
On large new builds, like the homes going up in Falcon and Banning Lewis Ranch, automatic tools save a lot of time. An automatic taper (often called a "bazooka") puts tape and mud on a seam in a single pass. Flat boxes on long handles spread an even coat of mud over flat seams. A corner finisher smooths inside corners straight in one stroke. On long, open walls, these tools are fast and very consistent.

Hand Finishing for Basements, Repairs, and Tight Spaces

Basements with lots of soffits and short walls, repairs, and spots where new drywall meets old walls all need more control. That's where hand tools work best: a mud pan, taping knives, and trowels. It's slower work, but it gives a cleaner result in tight spaces and around lots of corners.

Why It Matters for Your Price

We choose tools based on what gives you the best finish, not what's fastest for us. You'll see that reflected in your quote. Big, open walls in a new home cost less per square foot than a basement full of soffits and corners, because the tools and time involved are different. If you're comparing quotes, that's often why the per-foot prices don't match.

Straight Answers

DIY Drywall Finishing vs. Hiring a Drywall Finisher

We'll tell you honestly when a job is DIY-friendly. Here's how we'd advise a neighbor.

The JobOur AdviceWhy
Closet or utility roomDIY itNobody looks closely at the inside of a closet. It's a good place to learn, and mistakes won't matter much.
Garage at Level 2DIY if you're patientTape and one coat is forgiving. Just make sure the fire-separation walls and ceiling are fully taped, and keep the space warm in winter.
Basement you hung yourselfHire it outThis is the sweet spot for finish-only. Hours of finishing go into a basement, and it's the part everybody sees when you sell.
CeilingsHire it outMud wants to fall, your arms give out, and every window in the room lights up the ceiling. It's the hardest surface to finish well.
Smooth Level 5 wallsHire it outSmooth finishes need a full skim and a lot of practice to get flat. Under Colorado light, small mistakes are obvious.
Matching existing textureHire it outSpray cans almost never match. You end up with a visible patch right where you were trying to blend in.
A DIY finish that's not turning outCall before more coatsThe more mud goes on a bad seam, the more has to come off. Stopping early saves you money.

DIY tips: use paper tape with setting compound for the first coat, keep every coat thin, feather butt joints at least 16 inches wide, and check your work with a flashlight held flat against the wall before you paint. Our dry air makes thick coats crack, so patience pays off.

Before You Hire Anyone

How to Choose a Reputable Drywall Finishing Company in Colorado Springs

Ask Which Finish Level Is Included

This is the most important question. A good drywall finisher will answer right away and explain where a smooth Level 5 finish is worth it and where it isn't. Our quote will list the finish level for every room.

Ask Who Hangs and Who Finishes

Some companies hang the drywall and hire out the finishing, or the other way around. If seams show later, each crew can blame the other. On our jobs, the same crew does both, so we stand behind the whole result.

Read Reviews That Mention Finishing

Look past the star rating. Look for reviews that mention seams, corners, smooth walls, or how the walls looked after painting. Those tell you more about a finisher's skill.

Check Their PPRBD License and Insurance

Colorado doesn't have a statewide contractor license. In Colorado Springs and most of El Paso County, licensing goes through the Pikes Peak Regional Building Department, and you can look up any contractor at pprbd.org. Also ask for proof of liability insurance and workers' comp. We send both with every quote.

Get a Written Workmanship Warranty

Ask what happens if a seam cracks or tape bubbles after your walls are painted. A verbal promise is hard to hold anyone to. Ours is a written warranty covering tape, mud, corners, and finish. If something isn't right, we come back and fix it.

Should You Hire Separate Drywall Hangers and Finishers?

Builders often use one crew to hang and another to finish, and it works well when both crews are good. For homeowners, one company that does both is usually simpler. This way, you have one schedule, one person to call, and no finger-pointing if a seam shows later.

If you've already hung the drywall yourself, a finish-only crew is exactly what you need. Just make sure they check your hang job before they start taping.

Drywall Finisher vs. Handyman vs. Painter: Who Should You Hire?

For a couple of small patches, a handyman or painter is a fine choice. For anything bigger, like new drywall, ceilings, or smooth walls, a dedicated drywall finisher is worth it. Good finishing takes years of practice, and it's the difference between walls that look custom and walls that look rushed.

We also take small jobs, so you don't have to choose between experience and a fair price.

Local Knowledge

Drywall Finishing Across Colorado Springs: What We See in Each Area

We've been finishing drywall around Colorado Springs since 2009. Our local experience means fewer surprises, a more accurate quote, and a finish that fits your house.

Basement Finishes

Basement Drywall Finishing in Falcon, Meridian Ranch, Banning Lewis Ranch & Wolf Ranch

Newer east-side homes usually come with an unfinished basement, and many owners hang the drywall themselves. These basements tend to have large egress windows, long boxed-in duct runs, and a support beam down the middle. We finish clean, square edges around windows and ducts, and match the knockdown texture the builder sprayed upstairs, so the basement feels like part of the house.

Bullnose & Knockdown

Bonus Room & Garage Conversion Finishing in Briargate, Stetson Hills & Pine Creek

Homes built here from the late '80s through the 2000s usually have rounded bullnose corners and knockdown texture throughout. When we finish a bonus room or garage conversion, we match both, so the new space blends in instead of looking added on. Upstairs ceiling corners get a flexible finish, so winter truss uplift doesn't crack them open.

Older Homes

Blending New Drywall Into Plaster in the Old North End, Patty Jewett & Old Colorado City

Additions and remodels in older homes mean new drywall meeting old plaster walls that have settled over the decades and are rarely flat or square. We build up the new finish so it sits flush with the plaster and follow the wall's natural shape, so there's no obvious line where old meets new.

Custom & Luxury

Smooth Level 5 Finishes in Broadmoor, Flying Horse, Cheyenne Mountain & Kissing Camels

Custom homes here often have smooth walls, tray ceilings, arches, and tall windows facing the mountains. All of that light shows every flaw, which makes these rooms the best fit for a Level 5 finish. We test textures and finishes on a sample board first, and check every wall under the same light it'll get once you move in.

Mountain & Acreage

Garage, Shop & Log Home Drywall Finishing in Black Forest, Monument & Woodland Park

Colder nights up here mean we plan heat for any unheated garage or shop, so the mud dries properly. We finish shops and outbuildings to a practical, durable level without charging for a living-room finish. Where drywall meets log walls that keep settling for years, we leave a clean, trimmed gap so the logs can move without cracking the drywall.

Rentals & Builders

Drywall Finishing for Builders and Rentals in Fountain, Security-Widefield & Peyton

For builders and investors working on several homes or units, we keep the finish and texture the same from one to the next. We stick to the schedule we give you and close out punch lists quickly, so your painters and flooring crews can move in right behind us.

Why Choose Us

A Local Drywall Finishing Company in Colorado Springs Since 2009

We're a proudly local, family-owned crew, not a franchise.

Because we also do drywall repair, ceiling repair, and popcorn ceiling removal, we get called to fix a lot of other people's finishing. We've seen what happens a few years after a rushed job, in Briargate two-stories, east-side basements, and older homes downtown alike. That's shaped how we work, and it's why we'd rather take an extra day than send you a callback.

Our customers include homeowners, DIYers who hung their own basement, military families on a PCS timeline, landlords, and local builders. Everyone gets the same thing: a straight answer, a firm price, and a crew that shows up when we say we will.

  • Free Same-Day Estimates
  • Firm Written Pricing
  • Written Workmanship Warranty
  • Zero Mess Guarantee
Written by Chris, Owner

I'm usually the one who answers the phone, and the one who comes out to look at your walls. If something isn't right after we've finished, you call me, not a call center, and we come back and fix it. That's been true since our first job in the Springs, and it's how I plan to keep it.

Questions about your walls? Call me: ☎ (719) 600-2752

Looking for Drywall Finishers Near You?

Free, fast estimates on taping, mudding, and Level 4 or Level 5 finishing from a local Colorado Springs crew.

Areas We Serve

Drywall Finishers Serving Colorado Springs & El Paso County

Don't see your area? Call anyway. If it's within driving distance, we'll come.

Colorado Springs Briargate Rockrimmon Stetson Hills Pine Creek Northgate Old North End Old Colorado City Broadmoor Cheyenne Mountain Flying Horse Banning Lewis Ranch Wolf Ranch Cordera Meridian Ranch Cimarron Hills Security-Widefield Fountain Falcon Peyton Monument Black Forest Manitou Springs Woodland Park
Questions We Hear Every Week

Drywall Finishing FAQs

Drywall Finishing Cost

What is the average cost to finish drywall?

In Colorado Springs, finishing drywall usually costs $1-$2 per square foot of wall and ceiling surface for a Level 4 finish with texture. A smooth Level 5 finish runs about $1.50-$3 per square foot. A typical 12'×12' bedroom has about 530 square feet of drywall, so finishing it costs roughly $550-$1,100.

Where you land in that range depends on your space. Big, open rooms and whole basements land at the low end. Small rooms, tall ceilings, lots of corners, and a hang job that needs fixes first push toward the top. We'll look at your space for free and give you a firm written price. Try our drywall finishing cost calculator for a quick estimate.

How much does a Level 5 drywall finish cost?

A Level 5 finish usually adds $0.50-$1.00 per square foot over a Level 4 finish, for a total of about $1.50 to $3.00 per square foot finish-only. On a large 20'×20' room with about 1,000 square feet of drywall, that's roughly $1,500-$3,000 total. We can help you save money by recommending Level 5 only in rooms with smooth walls or strong window light, and Level 4 with texture everywhere else.

How much does it cost to tape and mud a basement?

For a typical 1,000 square foot basement in Colorado Springs, taping, mudding, and texture usually costs $2,500 to $5,500+. That covers about 3,000 to 3,500 square feet of drywall on the walls and ceilings.

Simple, open basements land at the low end. Boxed-in ducts and beams, large egress windows, rounded corners, and a smooth Level 5 finish push it toward the top.

Do drywall finishers charge by the hour?

Some do, usually $45 to $85 per hour per person in Colorado Springs, plus materials. Since drywall mud needs time to dry between coats, hourly jobs tend to stretch across several visits, and the final bill can be hard to predict.

We quote a flat price for the whole job instead. You'll know your total before we begin, and it won't go up if the work takes longer than expected. It's a simpler way to budget, and it puts the pressure on us to get it right the first time. See how our drywall finishing pricing works.

Do you take small drywall finishing jobs?

Yes we do. A closet, a single wall, or a section tied into an existing room is priced by the job, often $250 to $600. If you have a few small areas, bundling them into one visit keeps the cost down.

Hiring a Drywall Finisher

Are there drywall finishing contractors near me in Colorado Springs?

Yes, we've been taping and finishing drywall in Colorado Springs since 2009. We cover the whole city plus Fountain, Security-Widefield, Falcon, Peyton, Monument, Black Forest, Manitou Springs, and Woodland Park. Call us at (719) 600-2752 and we can usually give you a price range the same day.

What are some reputable drywall companies in Colorado Springs?

A reputable drywall company will tell you which finish level they're quoting, show you work photographed in angled light, carry liability insurance and workers' comp, and put the warranty in writing. You can look up local contractor licensing through the Pikes Peak Regional Building Department at pprbd.org. We're happy to answer every one of those questions with your quote. See our guide to choosing a drywall finisher.

Is a sheetrock finisher the same as a drywall finisher?

Yes, they are. Sheetrock is a brand name that became the everyday word for drywall. Sheetrock finishers, drywall finishers, tapers, and mudders all do the same job: taping, mudding, sanding, and texturing after the board is hung.

Can you finish drywall that I hung myself?

Absolutely. Finish-only is one of our most common jobs. We walk your hang job before we start and point out anything that would cause problems later, like loose screws, wide gaps, sheets touching the slab, or screws in the bottom plate of a floating wall. Finish-only to Level 4 typically costs $1–$2 per square foot of drywall surface (walls and ceilings, not floor area). Small rooms, high ceilings, or hang jobs that need extra correction may land toward the upper end.

Do you install and finish drywall?

Yes, we handle complete hang-and-finish projects, finish board that someone else hung, and hang-only work for builders who have their own finishers. On full jobs, the same crew hangs and finishes: if something isn't right, it's on us and we fix it. See our drywall installation page for pricing.

Can you fix a bad drywall finishing job?

Yes, and we do it often. We start by figuring out why the finish failed so the same problem doesn't come back. Loose or bubbled tape gets cut out and re-bedded, humped seams get sanded down and feathered wide, and seams showing through paint usually need a skim coat. Full re-finishing typically runs $1.25-$2.50 per square foot of drywall surface, depending on how much needs to be redone. Smaller fixes, like a few bad seams or corners, are priced by the job.

Process, Finishes & Timing

Do I need a Level 4 or Level 5 drywall finish?

Level 4 is right for most Colorado Springs homes getting knockdown or orange peel texture. Choose Level 5 if you want smooth walls with no texture, plan to use paint with a sheen or a dark color, or have big windows or skylights that throw light across the walls at a low angle. See our Level 4 vs. Level 5 guide.

How many coats of mud does drywall need?

A standard Level 4 finish needs three coats on seams and inside corners: a tape coat, a fill coat, and a finish coat. Screw heads also get three coats. Level 5 adds a skim coat over the entire surface. One coat is a Level 2 finish, which is only appropriate for garages and areas that won't be seen.

How long does drywall finishing take?

A single room usually takes 3-4 working days from tape coat to primer-ready. A typical basement takes around 6-8 working days of finishing, and a new house about two weeks. Most of the time goes to letting each coat dry before the next one.

How long does drywall mud take to dry in Colorado?

Faster than in most places. Our dry air means a thin coat of premixed mud often dries in 4 to 12 hours in a heated house. Setting compound (often called "hot mud") doesn't rely on air at all. It hardens by chemical reaction in about 45 to 90 minutes, which is why we use it for deep fills and tight schedules. Thick coats of premixed mud are the exception: they can feel dry on the surface while still soft underneath, so we give them extra time. Temperature matters too. Below 55°F, mud won't cure properly, so cold garages and basements need heat before we start.

Can drywall be finished in winter?

Yes, as long as the space stays above 55°F while the compound, texture, and primer cure. In a lived-in house, the furnace usually handles it. Unheated garages, additions, and new builds need temporary heat, which we plan into the schedule.

Why do my drywall seams show through the paint?

There are two common causes, and they have different fixes. The first is flashing: joint compound and the drywall's paper face absorb paint differently, so seams show up as dull or shiny stripes. It's most noticeable with eggshell or satin paint and when light hits the wall at a low angle, like near a window. A high-build primer reduces flashing, and a Level 5 skim coat eliminates it by making the whole surface uniform. The second cause is a seam that's slightly raised or wasn't feathered out wide enough. Paint and primer can't hide a ridge, so the seam has to be sanded down and re-feathered first. We'll look at your walls in raking light and tell you which problem you have before recommending anything.

What is a drywall corner finisher?

A corner finisher, also called an angle head or corner flusher, is a tool on an extension handle that smooths joint compound on both sides of an inside corner in a single pass. It's what gives pro corners that straight, crisp line from floor to ceiling. Finishers working by hand get a similar result with a corner trowel, though it takes practice. Inside corners are one of the most common trouble spots on DIY jobs because working both sides at once tends to drag mud off the side you just smoothed. If you're doing your own corners, try finishing one side, letting it dry, and then doing the other side. It's slower but much easier to keep straight. If your corners already look wavy or cracked, we can clean them up as part of a finish or repair job.

Should drywall be finished with paper tape or mesh tape?

For most seams, paper tape. It's stronger than mesh and creases cleanly, which is why we use it on almost every flat seam and every inside corner. Mesh tape still has its place, especially for patches and small repairs, but it needs to be covered with setting compound rather than premixed mud. Mesh is more flexible, and premixed mud isn't strong enough on its own to keep the seam from moving. That combination is one of the most common causes of cracked seams we see in Colorado Springs homes.

What primer should go on new drywall?

New drywall always needs a primer before paint, because joint compound and the paper face absorb paint differently. Without primer, every seam and screw spot can show through as a dull patch. For most rooms, a standard drywall primer (often a PVA primer) does the job. For smooth walls in bright or low-angle light, a high-build primer is worth the extra cost because it does a better job evening out the surface. And don't count on "paint and primer in one" products to replace a real primer on bare drywall. They work well over previously painted walls, but new drywall needs a dedicated primer coat first.

Can you texture the walls after finishing?

We sure can. Most Colorado Springs homes get knockdown or orange peel, and we test it on a sample board until it matches your existing rooms. We also do hand textures like skip trowel. If you want smooth walls instead, we can do that as well.

Is drywall finishing messy?

Sanding drywall can be very dusty, so we contain it. We cover floors, hang plastic around the work area, seal HVAC returns, and use dust-collecting sanders. It's the same Zero Mess Guarantee we're known for on popcorn ceiling jobs across Colorado Springs.

Get a Free Drywall Finishing Estimate

Call, text photos, or send the form. Tell us roughly how much drywall, whether it's hung yet, and the finish you want. We'll usually get back to you the same day.

Phone: (719) 600-2752

Service area: Colorado Springs, Fountain, Security-Widefield, Falcon, Peyton, Monument, Black Forest, Manitou Springs, Woodland Park, and throughout El Paso County.

Hours: Mon–Sun, 8:00 AM – 6:00 PM

🔒 Your information is private.

☎ Call Now Free Estimate